


Introducing AmeraLabs SiOmaster 3D Printing Resin – Your Gateway to Superior Printing Precision and Mechanical Strength!
Unlock a new realm of 3D printing excellence with AmeraLabs SiOmaster resin, a cutting-edge resin designed to elevate your prints to unparalleled heights. Crafted with precision and expertise, this resin harnesses the power of silicone-based technology, ensuring superior mechanical strength and outstanding printing precision. Embrace the future of 3D printing with SiOmaster, perfect for engineering applications, rapid prototyping, and high-resolution printing.
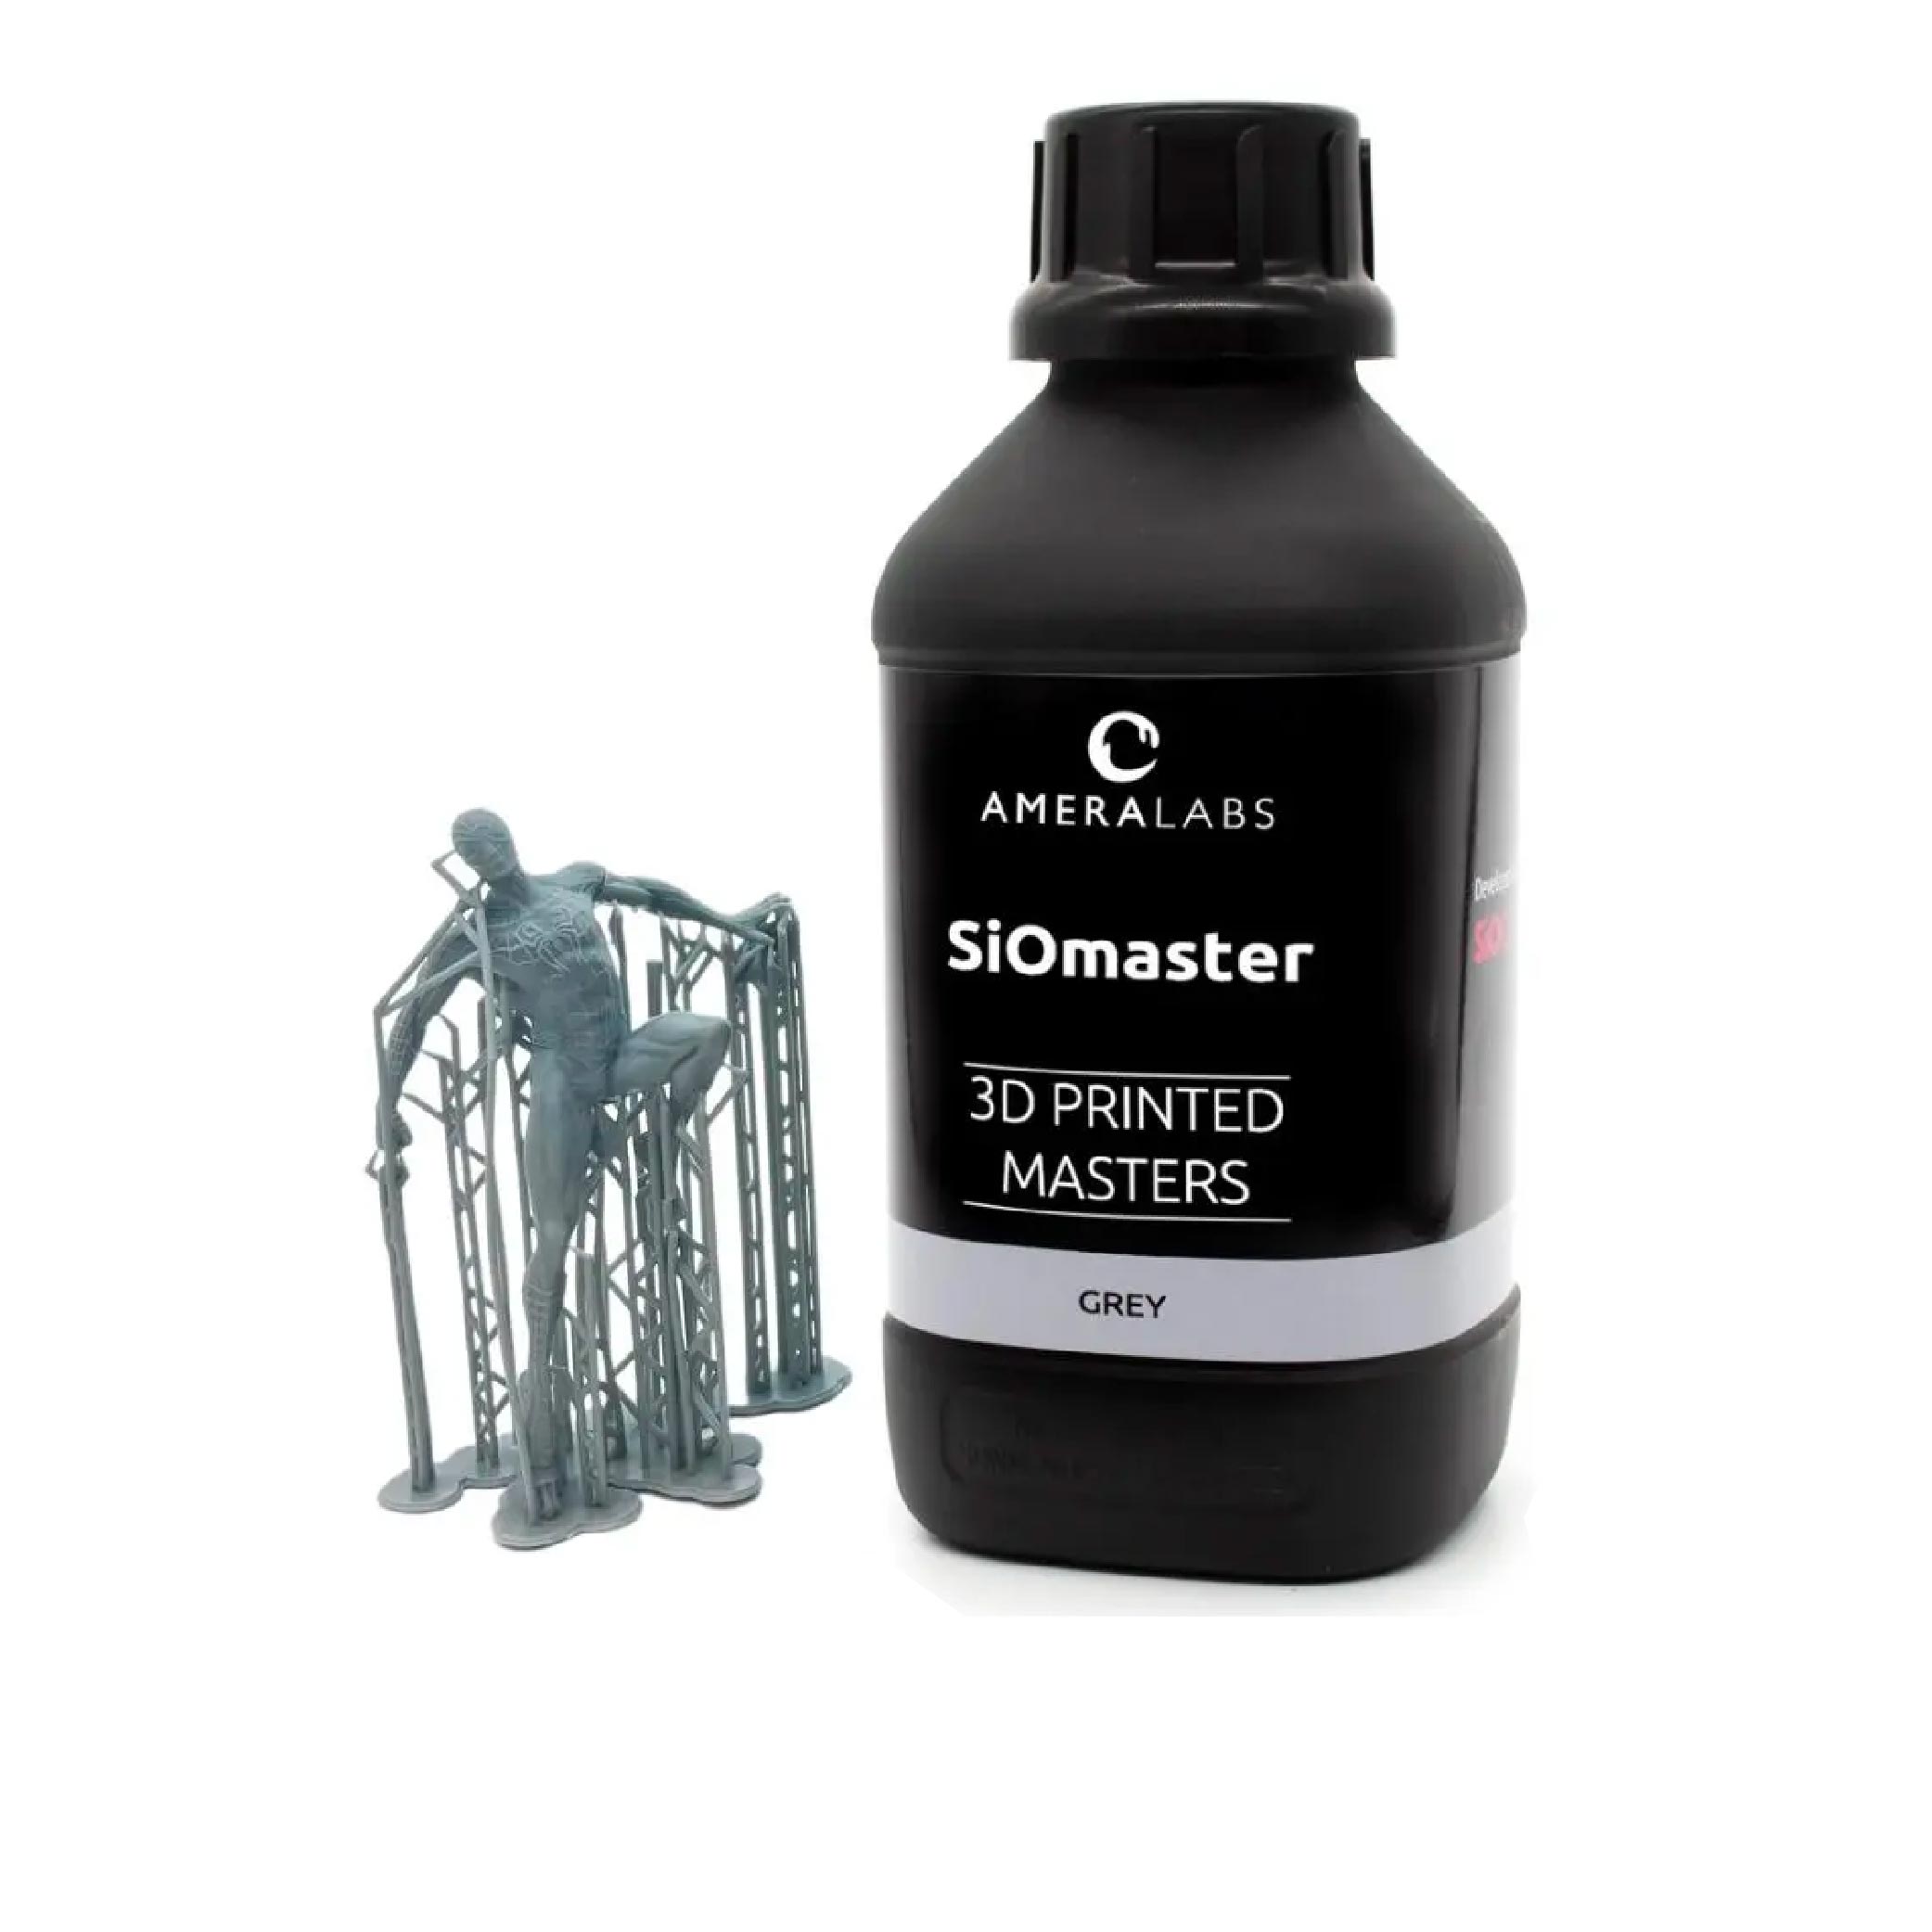
AmeraLabs SiOmaster Grey resin was developed for professionals utilising spin casting and SiOCAST injection moulding machines. SiOmaster resin allows you to 3D print master models that can withstand a high-temperature silicone rubber vulcanisation process up to 180°C multiple times without breaking or deforming. This enables companies to reuse their master models multiple times to produce several moulds.
Key Features
- High-Resolution Printing: Experience the pinnacle of precision with SiOmaster. Its high-resolution capabilities allow you to reproduce intricate details and fine features with pixel-perfect accuracy, ensuring every design comes to life with exceptional clarity.
- Versatility and Compatibility: Whether you’re a seasoned professional or a hobbyist, SiOmaster resin caters to a diverse range of applications. Compatible with various SLA/DLP/LCD 3D printers, it offers a seamless printing experience for all, making it an ideal choice for a wide range of projects.
- Mechanical Strength: SiOmaster resin stands tall with its impressive mechanical properties, making it a game-changer for functional prototypes and engineering parts. From stress tests to heavy-duty applications, SiOmaster excels in delivering sturdy and reliable prints.
- Post-Processing Ease: Enjoy the convenience of post-processing with SiOmaster. Its smooth surface finish minimizes the need for extensive finishing work, allowing you to spend more time perfecting your designs and less time on post-printing touch-ups.
Embrace the Power of SiOmaster
Step into a world of enhanced 3D printing with AmeraLabs SiOmaster resin. Seamlessly transition from concept to reality with its silicone-based technology, ensuring robust prints and superior precision. Whether you’re creating functional prototypes or intricate models, SiOmaster empowers you to explore the limitless possibilities of 3D printing. Embrace the future of additive manufacturing and elevate your projects with SiOmaster resin today!
